
Cue the drum roll please................
Today I present to you.......
THE FRAKENCLARE!
BOOM!
I know that many of you have been waiting for this beauty to grace the blog (sorry about that!) but here she is in all her glory!
The #FrakenClare is a mashup of views A and B of the Clare Coat by the amazingly awesome Heather over at ClosetCaseFiles (she's really the best! she gave me the much needed final nudge to take the plunge and hit the 'make public' button for this whole blog thing).
Waaaaaayyyyyy back in August Heather made a call out for pattern testers for a winter coat pattern. I had never done a pattern test before and thought it could be fun (and who doesn't love sneek-peeks of upcoming patterns??) When she sent along the first sketches of the Clare Coat I was smitten....the shape!, the zipper!, the welt pockets!, the oversize collar (clearly I have a jacket type when it comes to oversize collars....*ahem*two Minorus*cough*).....and right there was the dilemma.....I wanted all the cool bits of both jacket views in one......and thus the #FrakenClare was born.
Looking familiar???
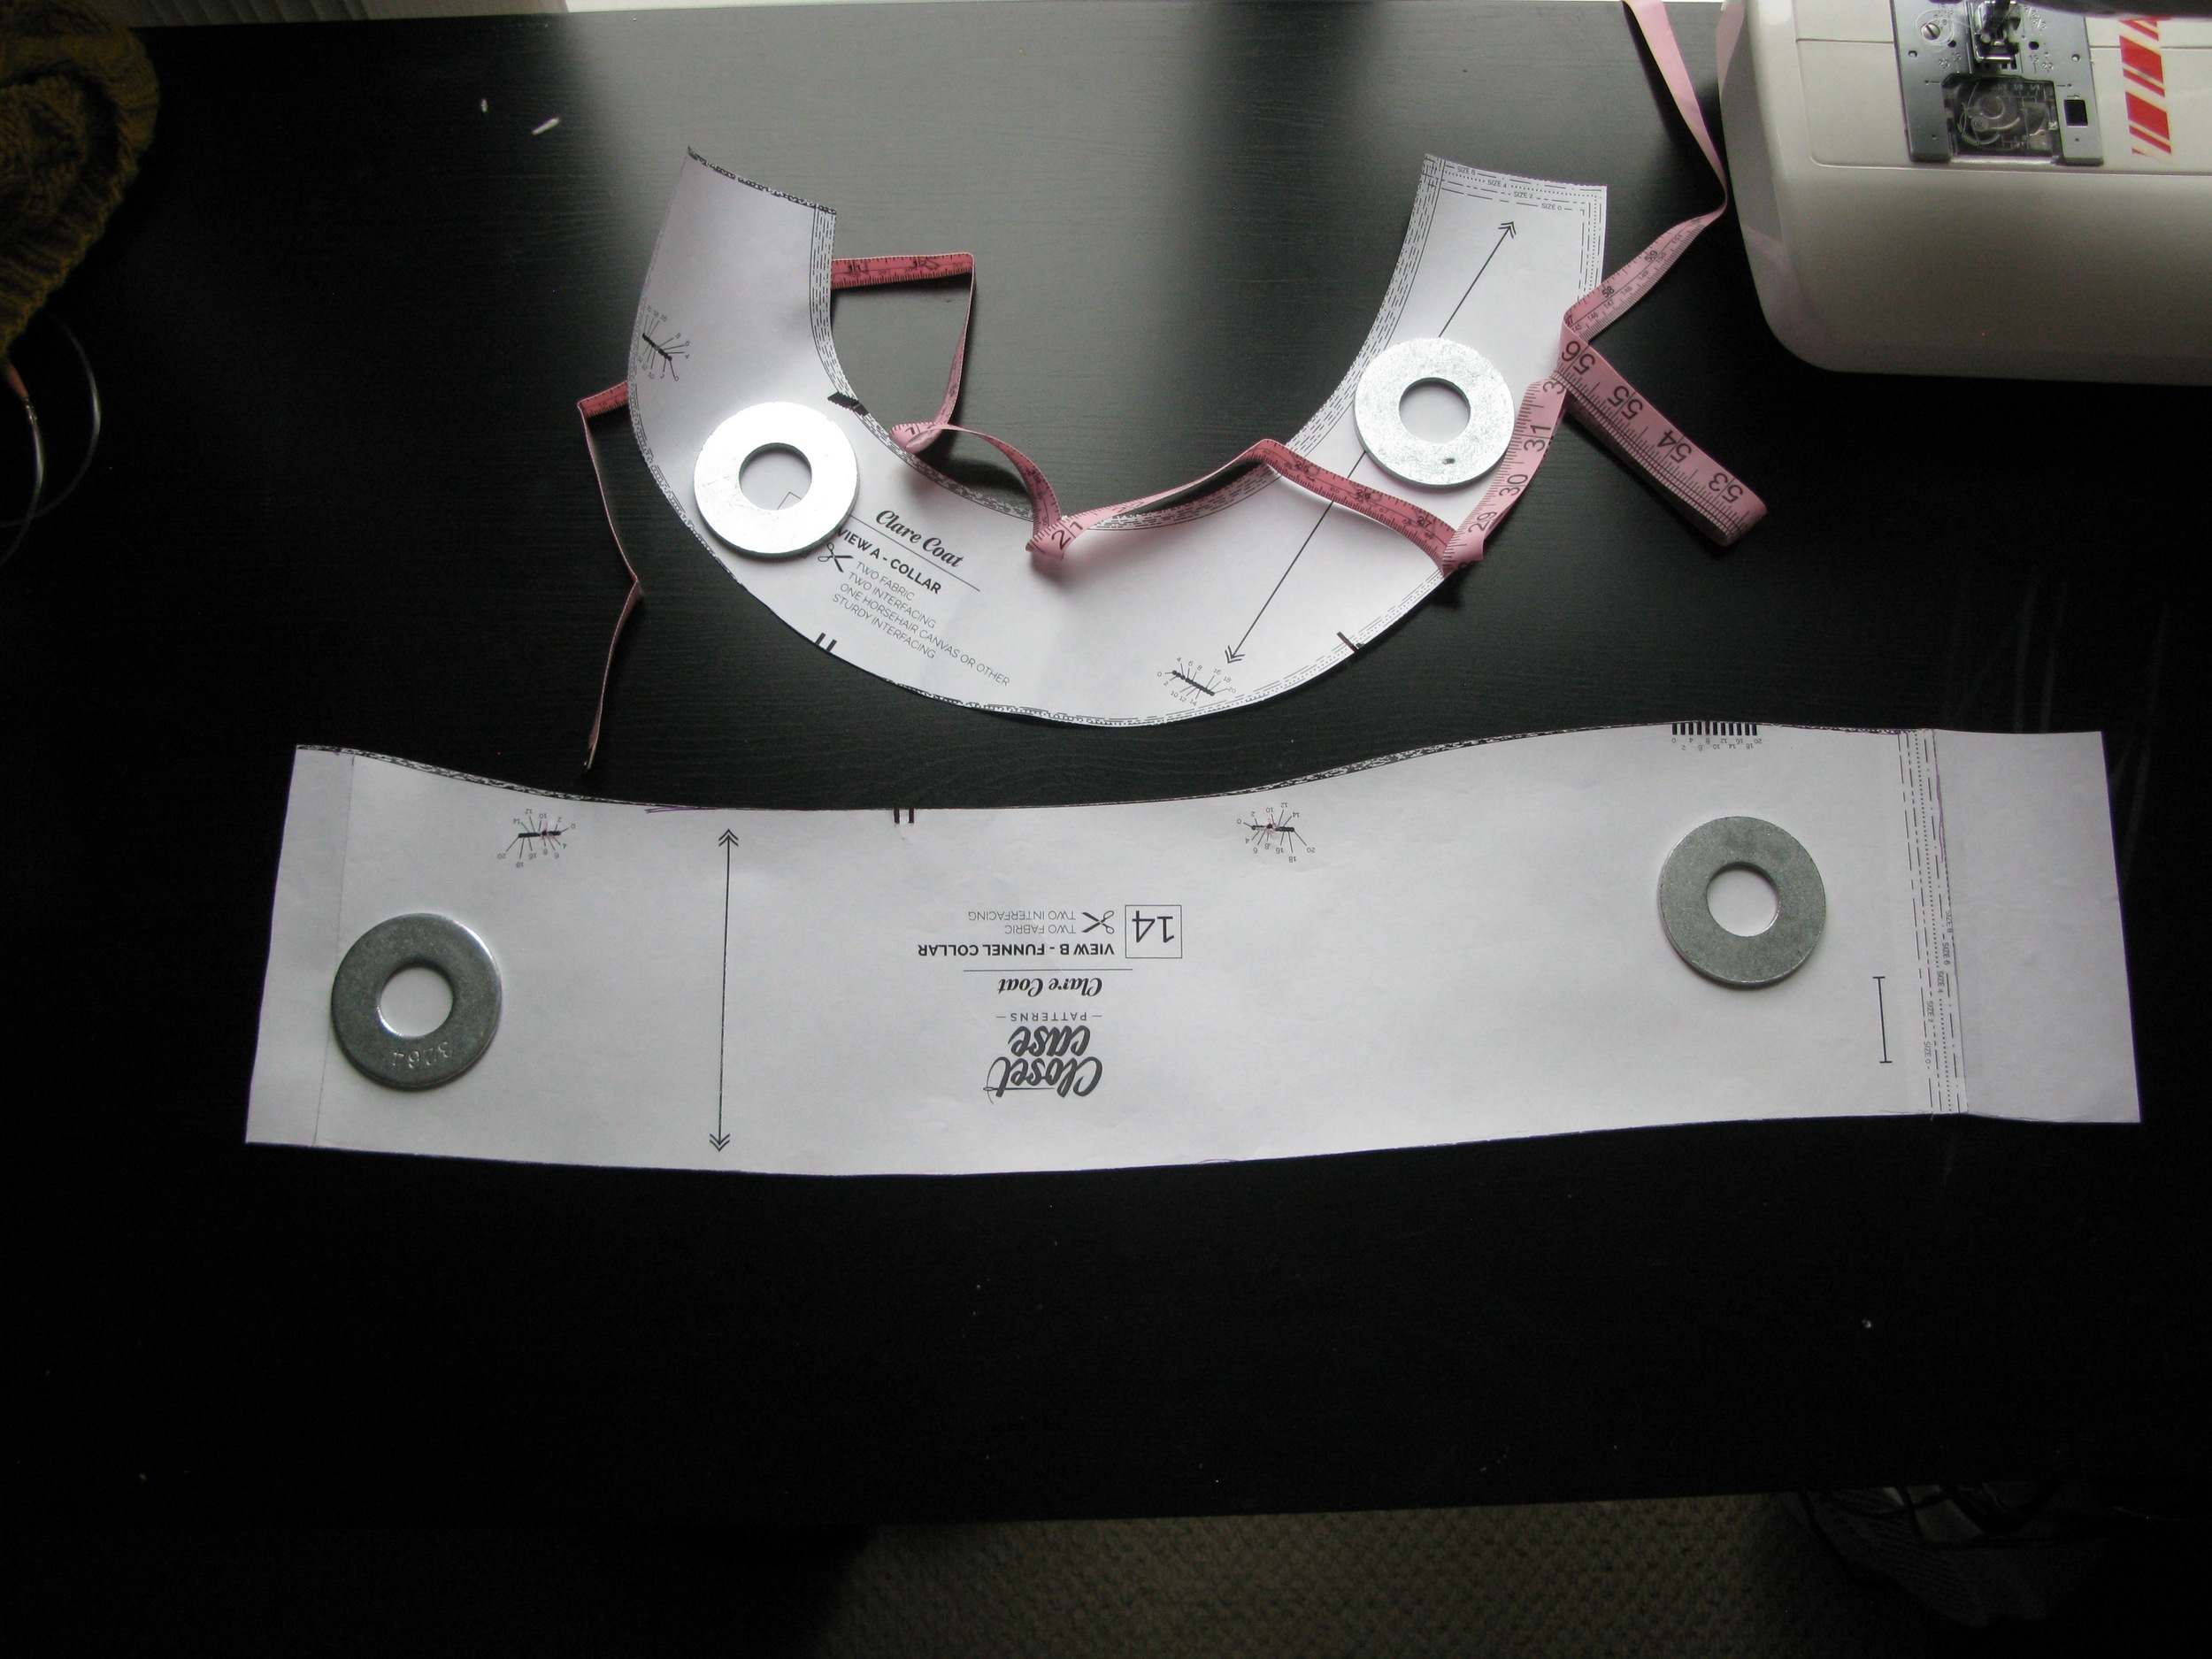
After running the idea past Heather (who was, of course, totally game to see if the two versions could be combined), I set to work. The biggest concern was how the zipper would play with the 'funnel collar'. In the pattern each view has a unique collar piece (see comparison below). View A (non-funnel collar) has a kind of a 'shallow J' shape that allows the front of the jacket to wrap around your neck to the asymmetrically placed zipper at the sleeve. View B has more of a straight, rectangle shape that is much longer since this version has a double breasted closure that overlaps at center front.
In order to swap the view A collar for the funnel collar in view B I took a closer look at the pattern markings on each pattern piece to identify the similarities between them. Both have two notches to indicate where the collar should line up with the center back of the jacket and circle markings that line up with the center shoulder seam. Taking these two points of reference together I could match up the two collar versions and see where I needed to remove length from the left side of the view B collar and add length to its right side (see below).

A close up of the two collar pattern pieces lined up, in order to clearly see where the two line up I've cropped out the ends of the view B piece.
I measured from the circle markings on the view A collar to their respective ends and added or subtracted to get the same distances from the circles to the ends on the view B collar (See below). I added a 1/2" of length on each end just to be on the safe side when making my muslin but it turned out my math was correct and I ended up cutting off the extra 1/2"s (I actually left them on when I cut my wool fabric and then cut them off when the collar was attached because I was paranoid that I had only gotten lucky with the muslin.....). The assembly of the collar followed Heather's instructions for view A. Heather will also be doing a post during her Clare Coat Sewalong about how to make this modification in case my instructions don't make sense, I'll link to it here when it's posted (she may have a completely different method to what I did but I though it would be nice to share my thought process).
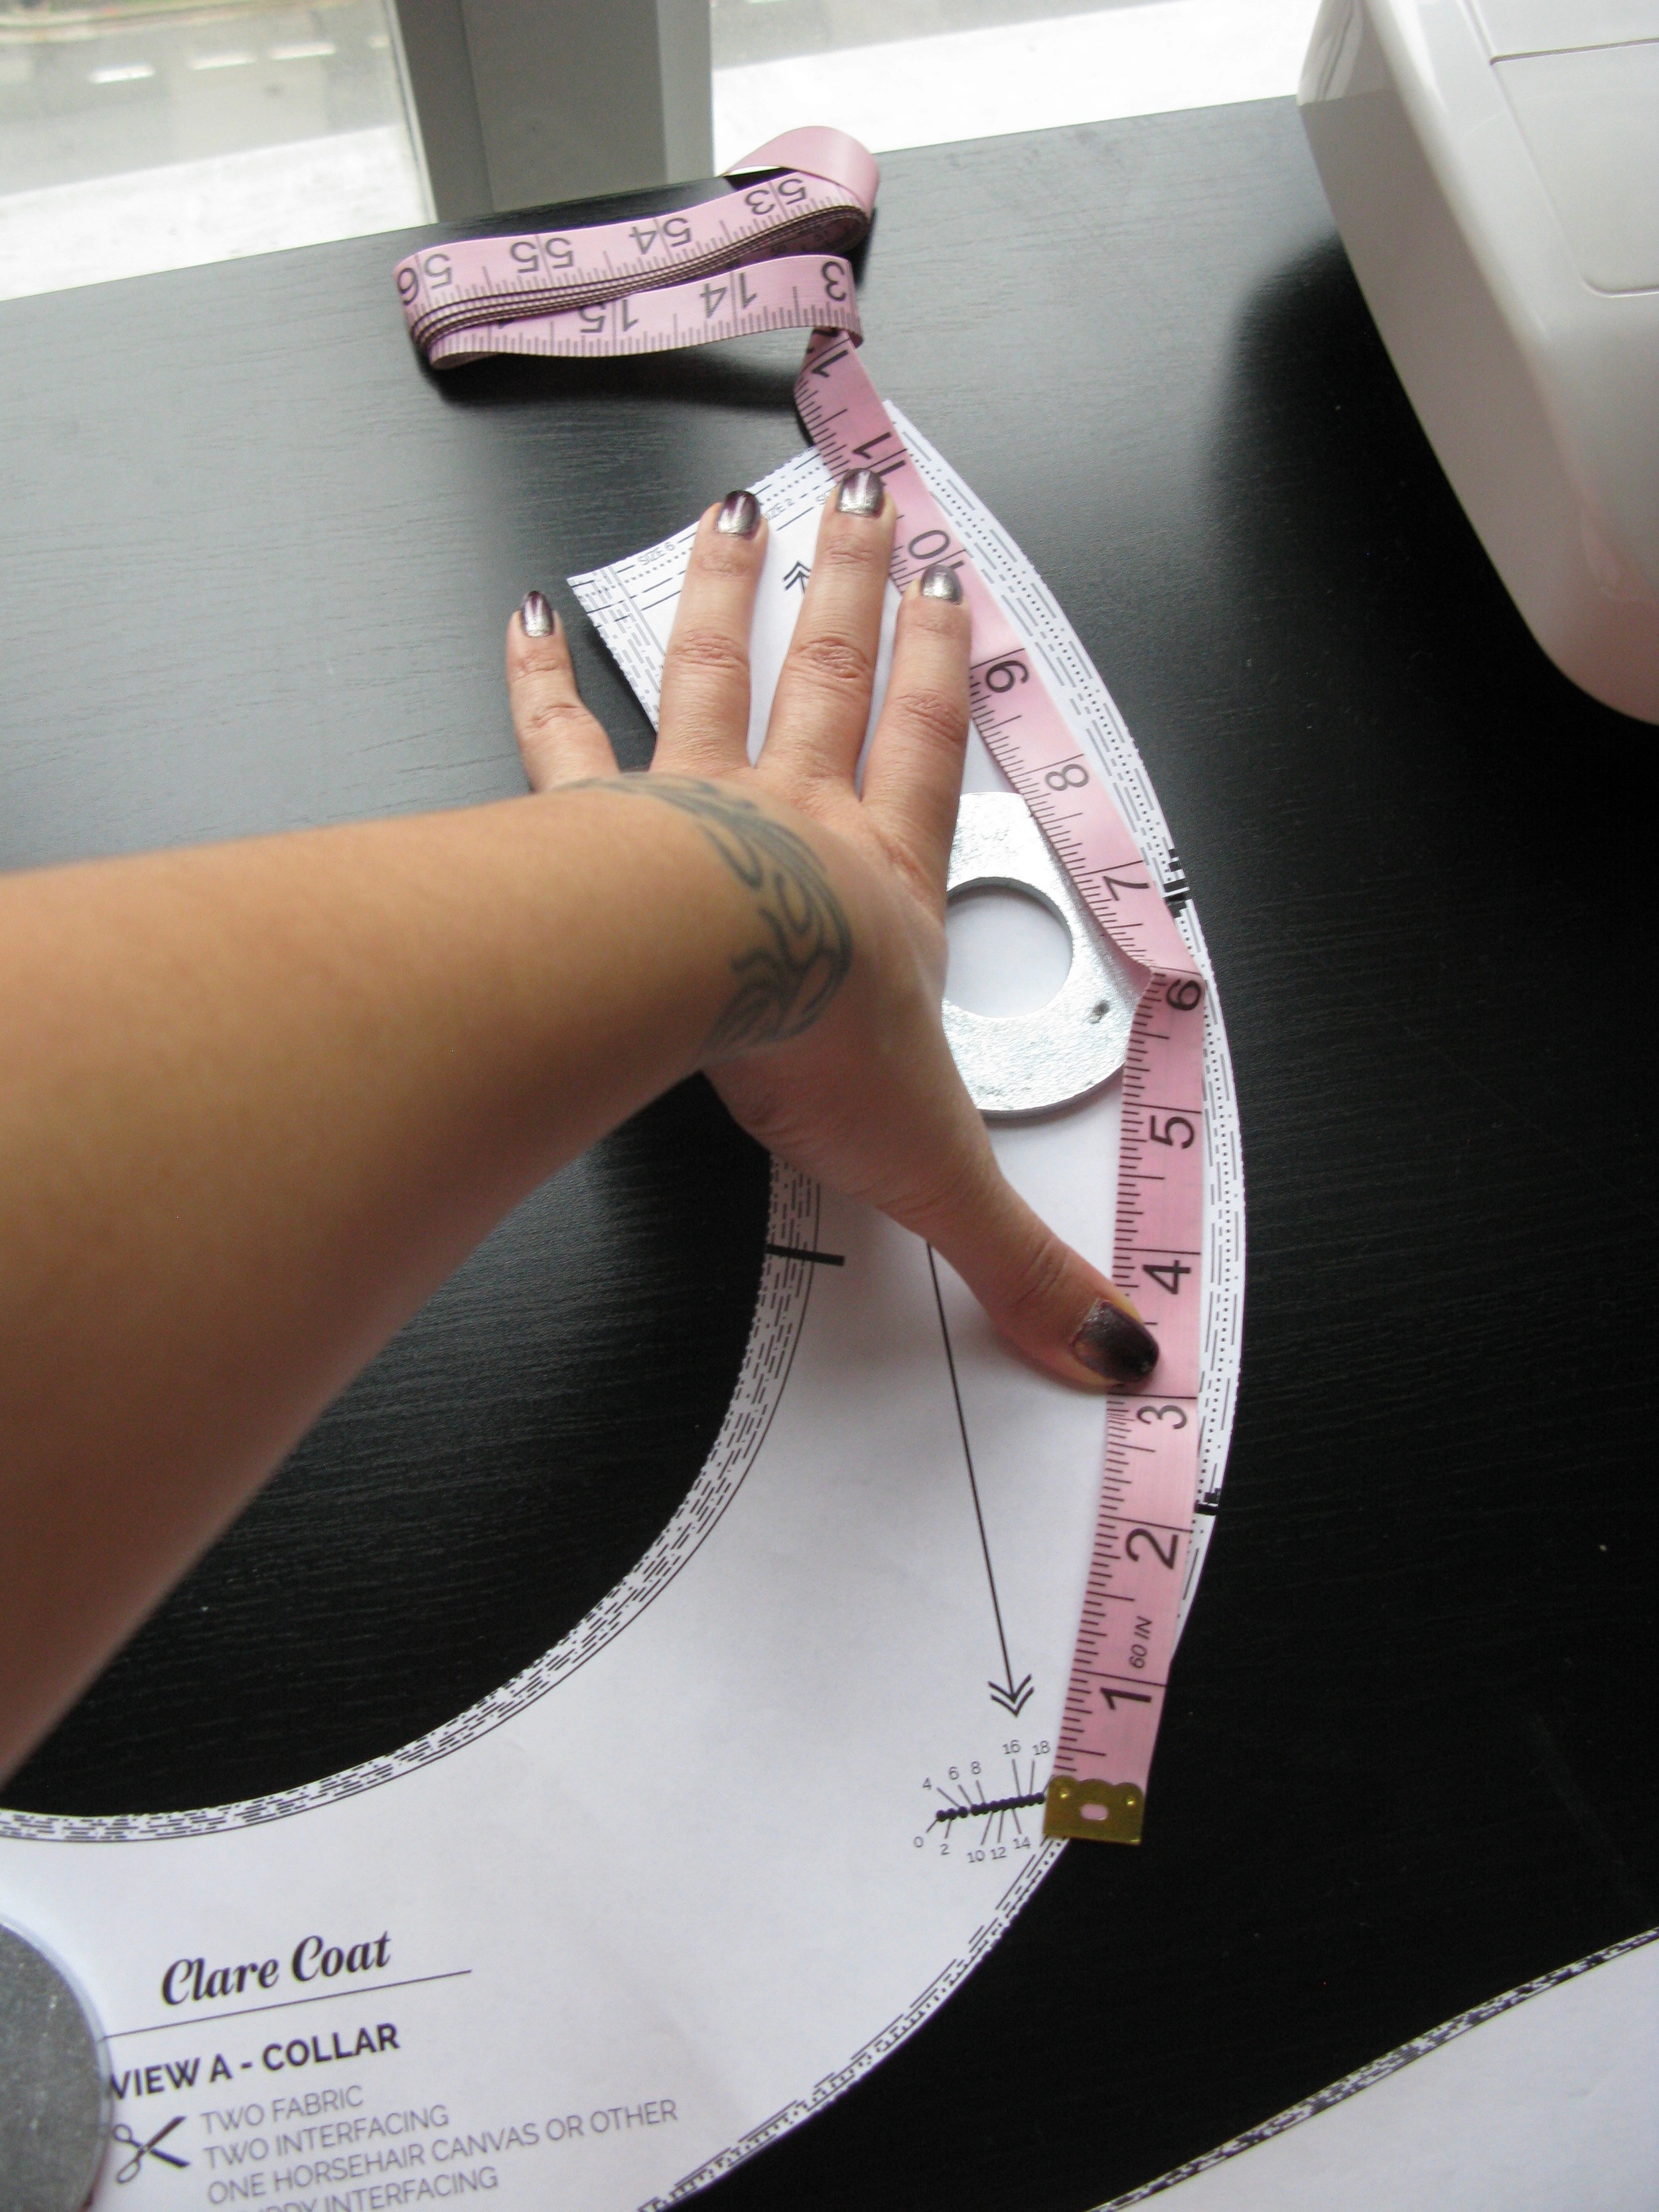
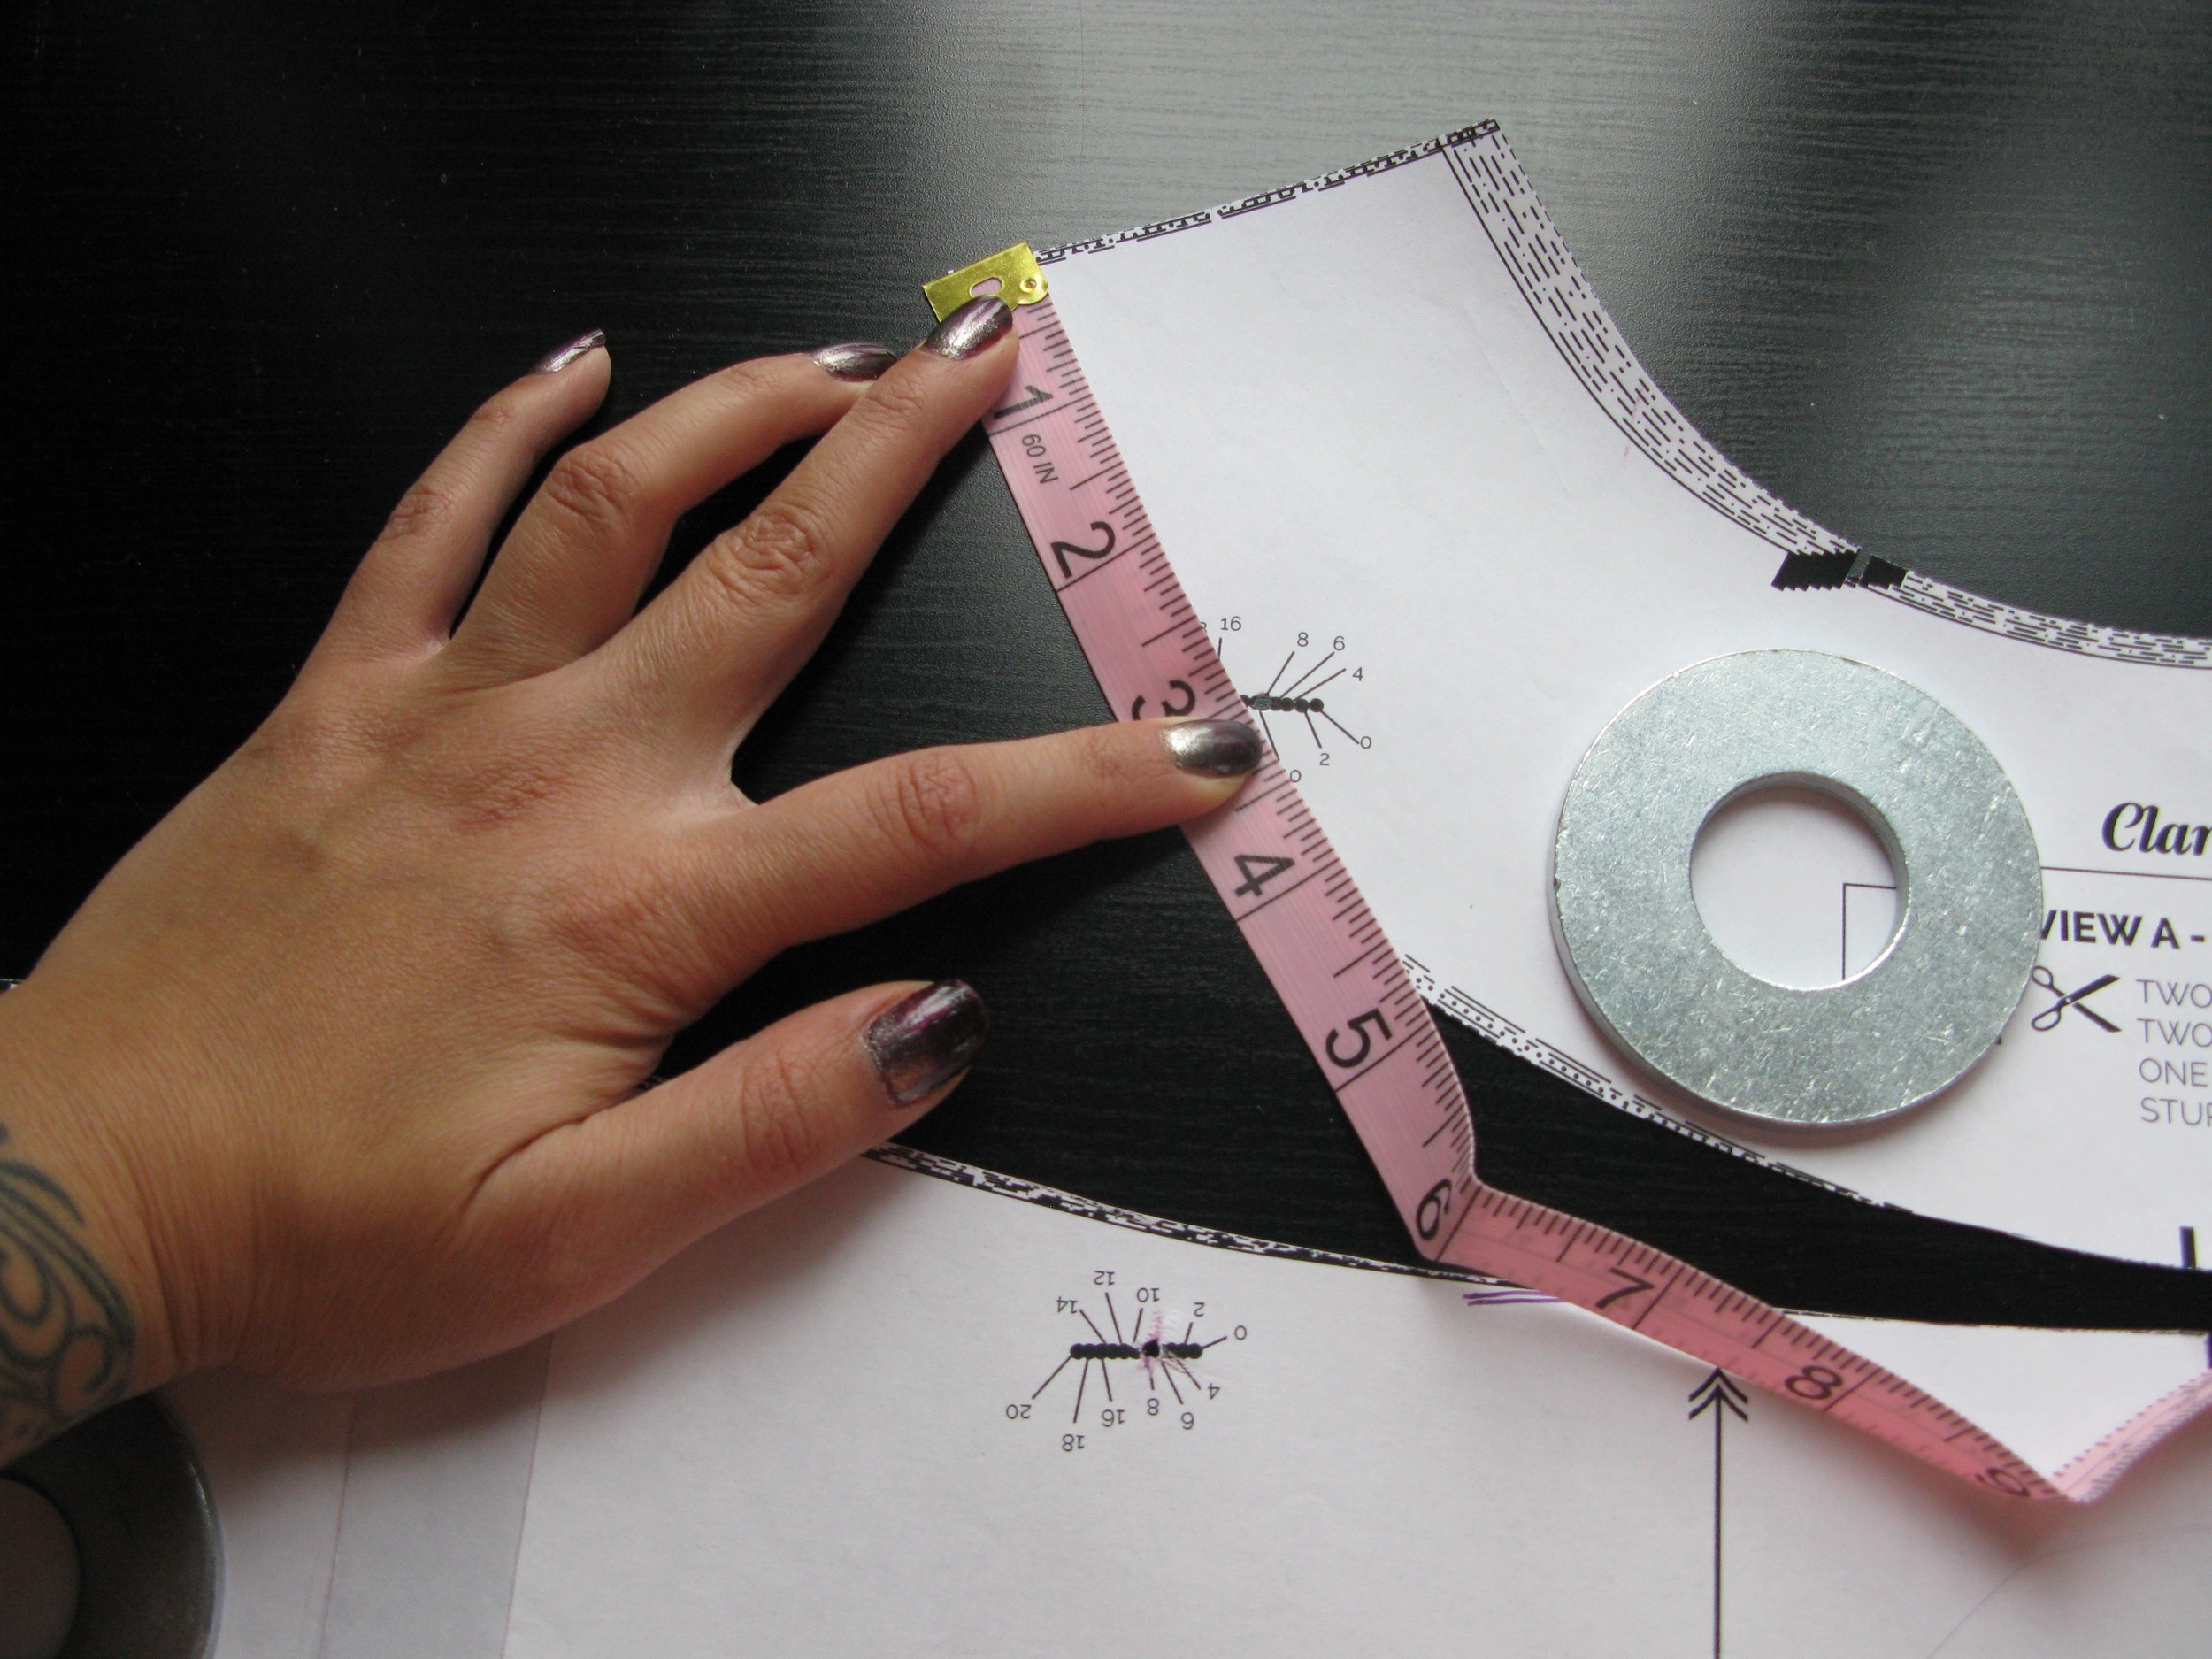
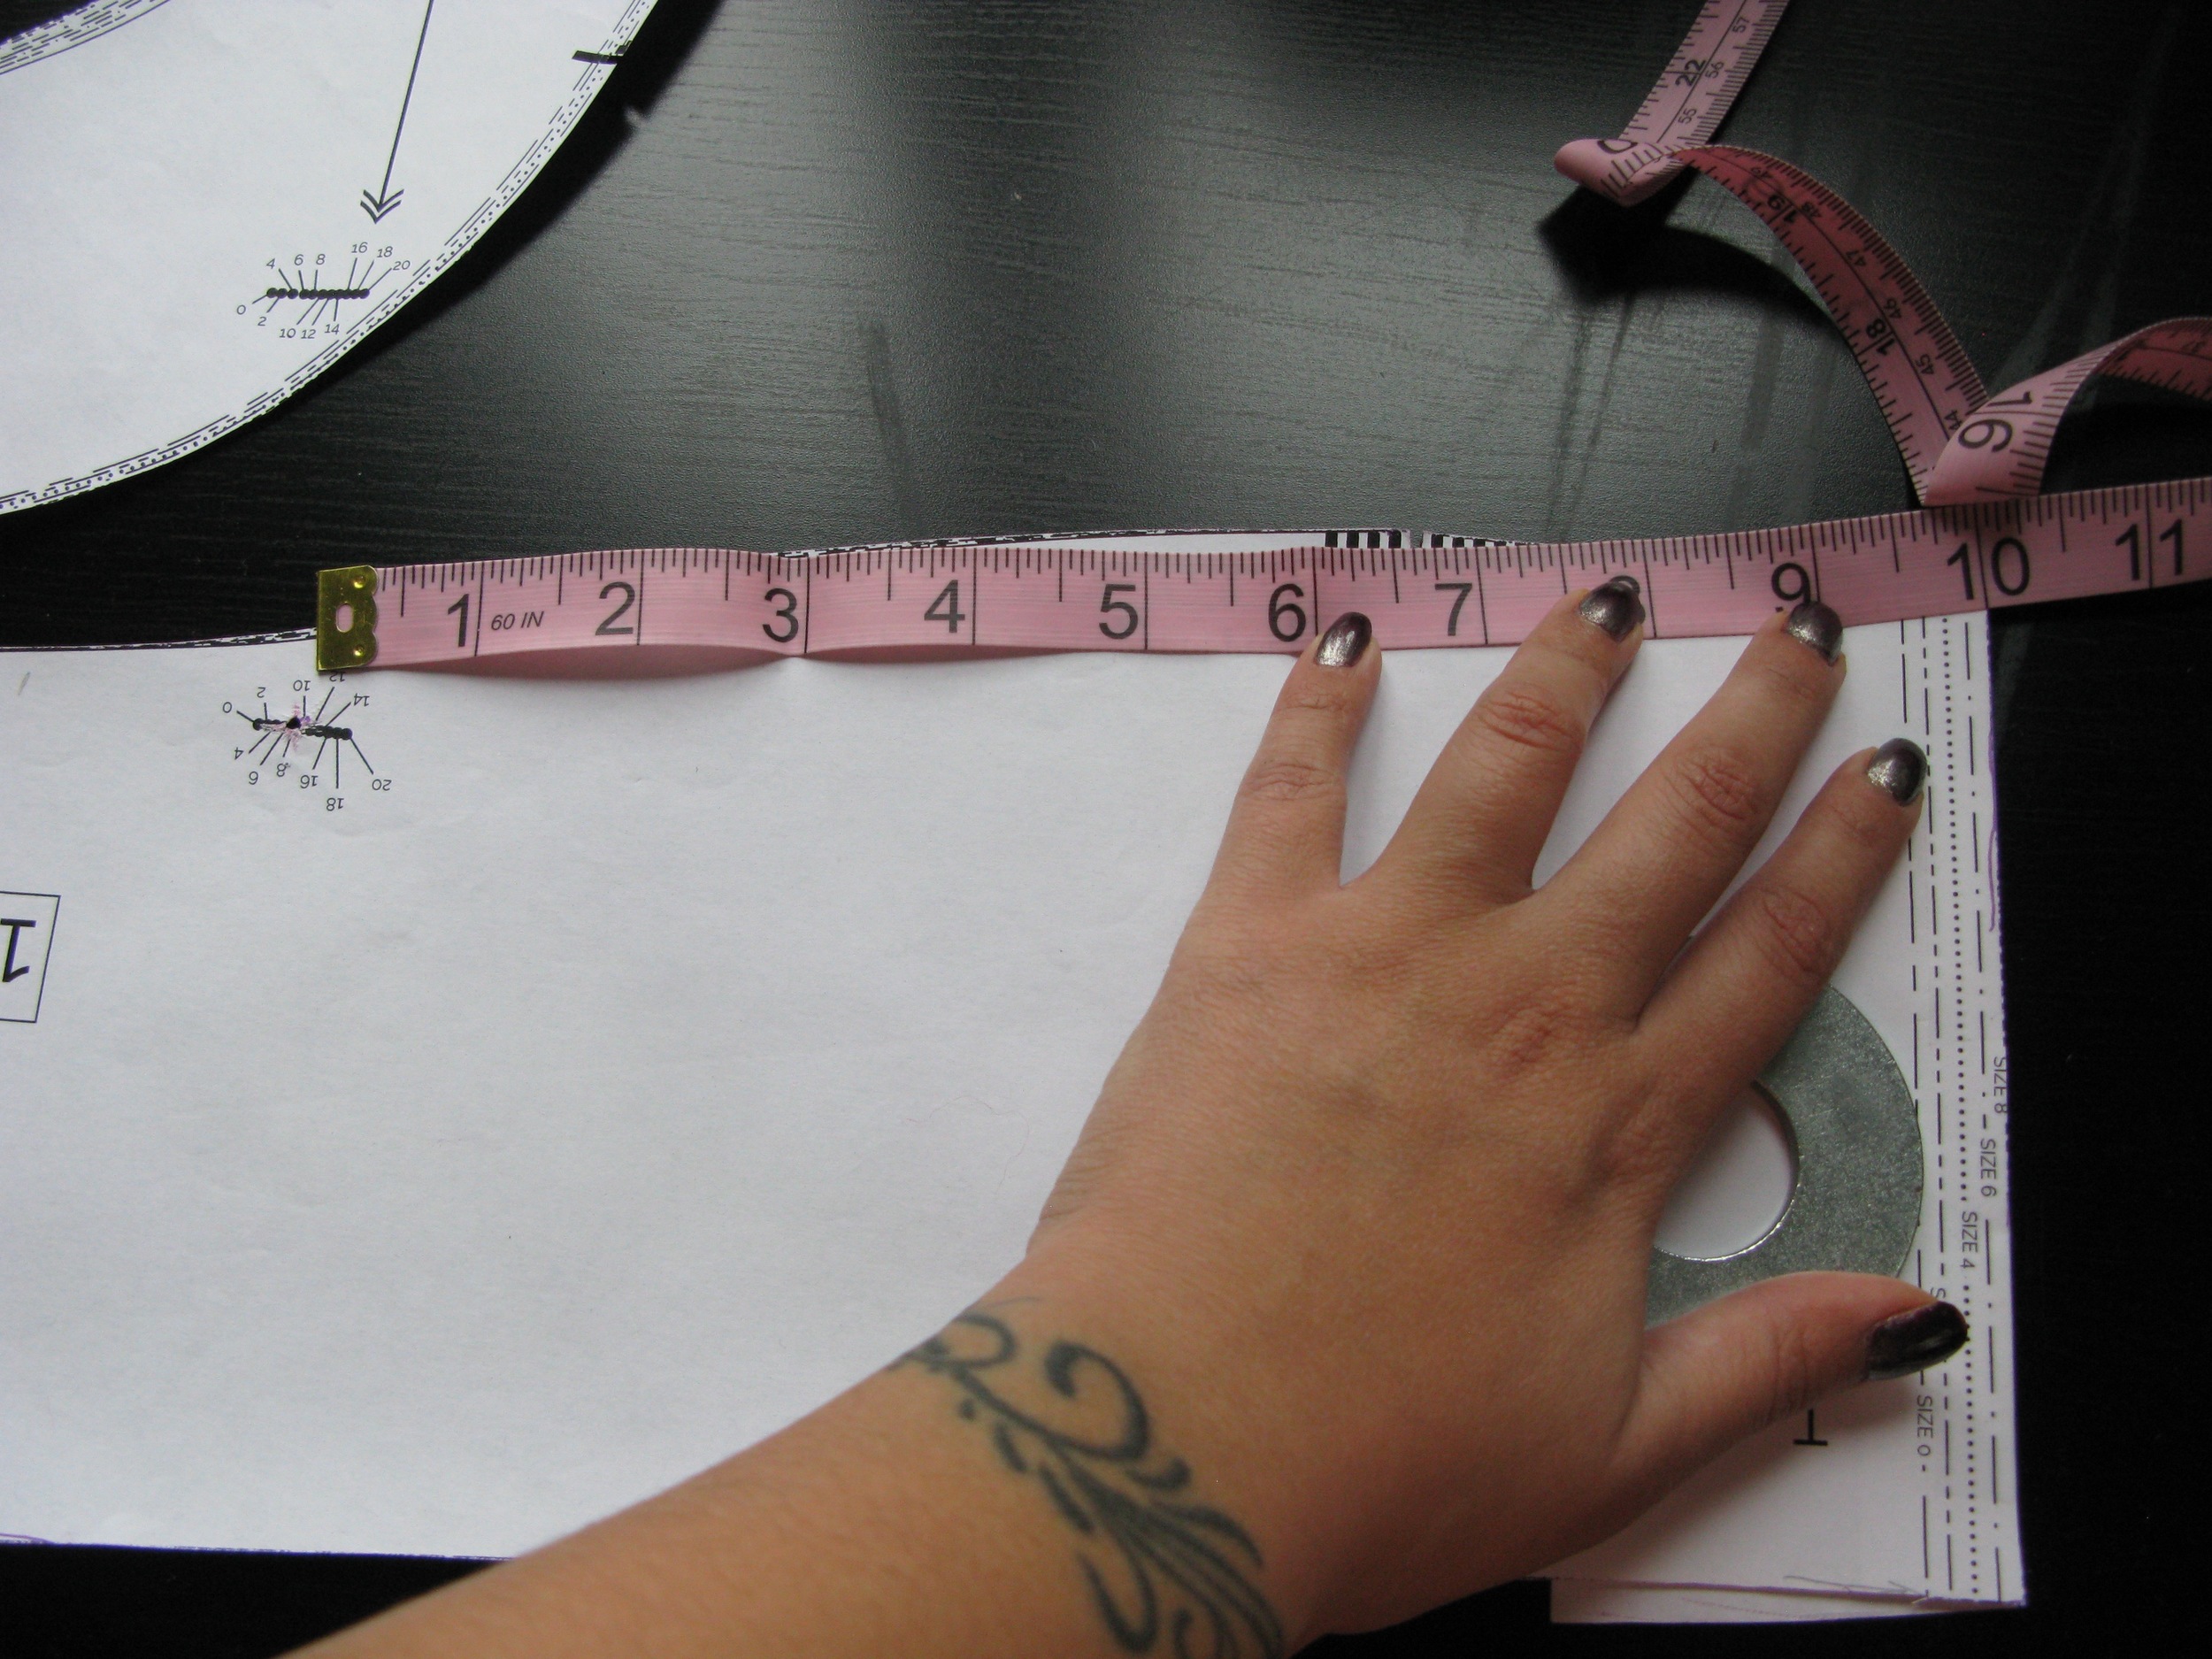
This gallery shows the steps I took to modify the view B collar piece. I took these photos using a measuring tape so you could get a rough idea of the differences in length but what I really did was to take some scrap yarn and trace out the distances and then measured the length of the yarn. Yarn is much easier to manipulate around the curve of the collars, especially view A, than a tape measure.
Since the zipper and collar together make such a big part of the over all 'look' of the FrakenClare it's super important that the collar line up properly once it's zipped up (if you do intend to zip it up all the way that is). I ripped out my zipper twice because the collar seam wasn't lining up straight once it was zipped up.....On my third attempt I attached one side of the zipper to the coat, did up the zipper and made a line across the zipper tape where the collar meets the jacket so that when I was pinning the tape to the other side the tape would line up nicely :)
Another thing I did to ensure the zipper looked good was to make sure the 2-3mm of exposed zipper tape was even along the length of the zipper. I did this by positioning the zipper along the coat edge until I liked the amount of tape showing, measured how far in from the coat edge the zipper tape edge lay, and then made a basting line of stitches along both coat fronts using this measurement. This way when I went to pin in the zipper tape I could simply line it up against the basting stitches :)
One important thing to note! If you are planning on making a #FrakenClare you need to take the extra height of the collar into account when buying a zipper. I bought the biggest zipper I could find (I think it was 40") since I wasn't sure how everything was going to pan out.... it turned out that I would have been ok buying the recommended 30" since I'm short and had to shorten the jacket anyway, more about that further down. Also, make sure you put zipper stops on your zipper after shortening it! I pulled the zipper pull off twice because I forgot to (the #zippercurse lives on!) Also X2, use the #FrakenClare on instagram so I can see your creation too!!
The only other modifications I made (other than for fit) was to use the view B sleeves which I actually shortened a tad too much but that ended up working in my favor as my hands fit nicely into the welt pockets without the sleeve cuff bunching up #TurningFailsIntoWins.
those welt pockets though.......
In terms of fit I had to shorten both the view B sleeves and the overall length of the jacket. I got super lucky in that since view B is a shorter length to begin with, (view A hits regularly heighted people mid-thigh and view B hits at the hip) and I'm so short, simply using the cutting line for view B meant that the coat hit me at mid thigh like view A should if I was not 'vertically challenged' :D
Final thing you may notice.....the zipper on my jacket is on the right hand side, not the left as in the pattern pictures......ya I goofed in cutting and forgot the note in the instructions where Heather points out to cut the front view on the RIGHT side of the fabric not the back as one normally would.......so it's a bit difficult for me to zip up as I am right handed.....If you happen to be left handed though putting the zipper on the right may make a nice change for you since we live in a right hand dominant world #CrushTheRight-iarchy.
Loving the silhouette!
I'm super glad that it's chilly enough now so that I can break out this coat....having sewn it in August (and taken all these pictures in August hence the tank top underneath....it was hot!) it was painful to then put her away in the closet for 4 months......oh and I should probably mention that the jacket fabric is a grey, melton wool and the lining (see awesome pic below!) is a red bemberg lining.
Red innards....note to self to steam jacket linings before taking photos...second note to self, ask for a steamer for christmas.....
This was a fun project to put together and a great staple to my coat collection (I swear I won't be making or posting about any more jackets! I'm on jacket probation from the #flufflyblondemonster). It was really cool to be part of a 'pattern in the making' and to be a part of Heather's amazing blog THANK YOU!!! :D (I seriously said "AH-GAH!" out loud when I saw my pic as the title picture for her post on the pattern tester versions! I was like "OMG THOSE ARE MY EYES! MAKE WEIRD NOISE NOW!")
Finally, I would like to make a huge internet shout-out to @cheesethief for finding this awesome graffiti wall and taking pictures for me! She takes amazing photos (especially of seagulls which are her favorite!) which you can find on her instagram.....if you scroll back to Aug you can find one of the man who watched us take all these photos while downing a beer and then asked to have his photo taken in front of graffiti, no joke this happened!
:D
Let me know in the comments what you think of the #FrankenClare! :D