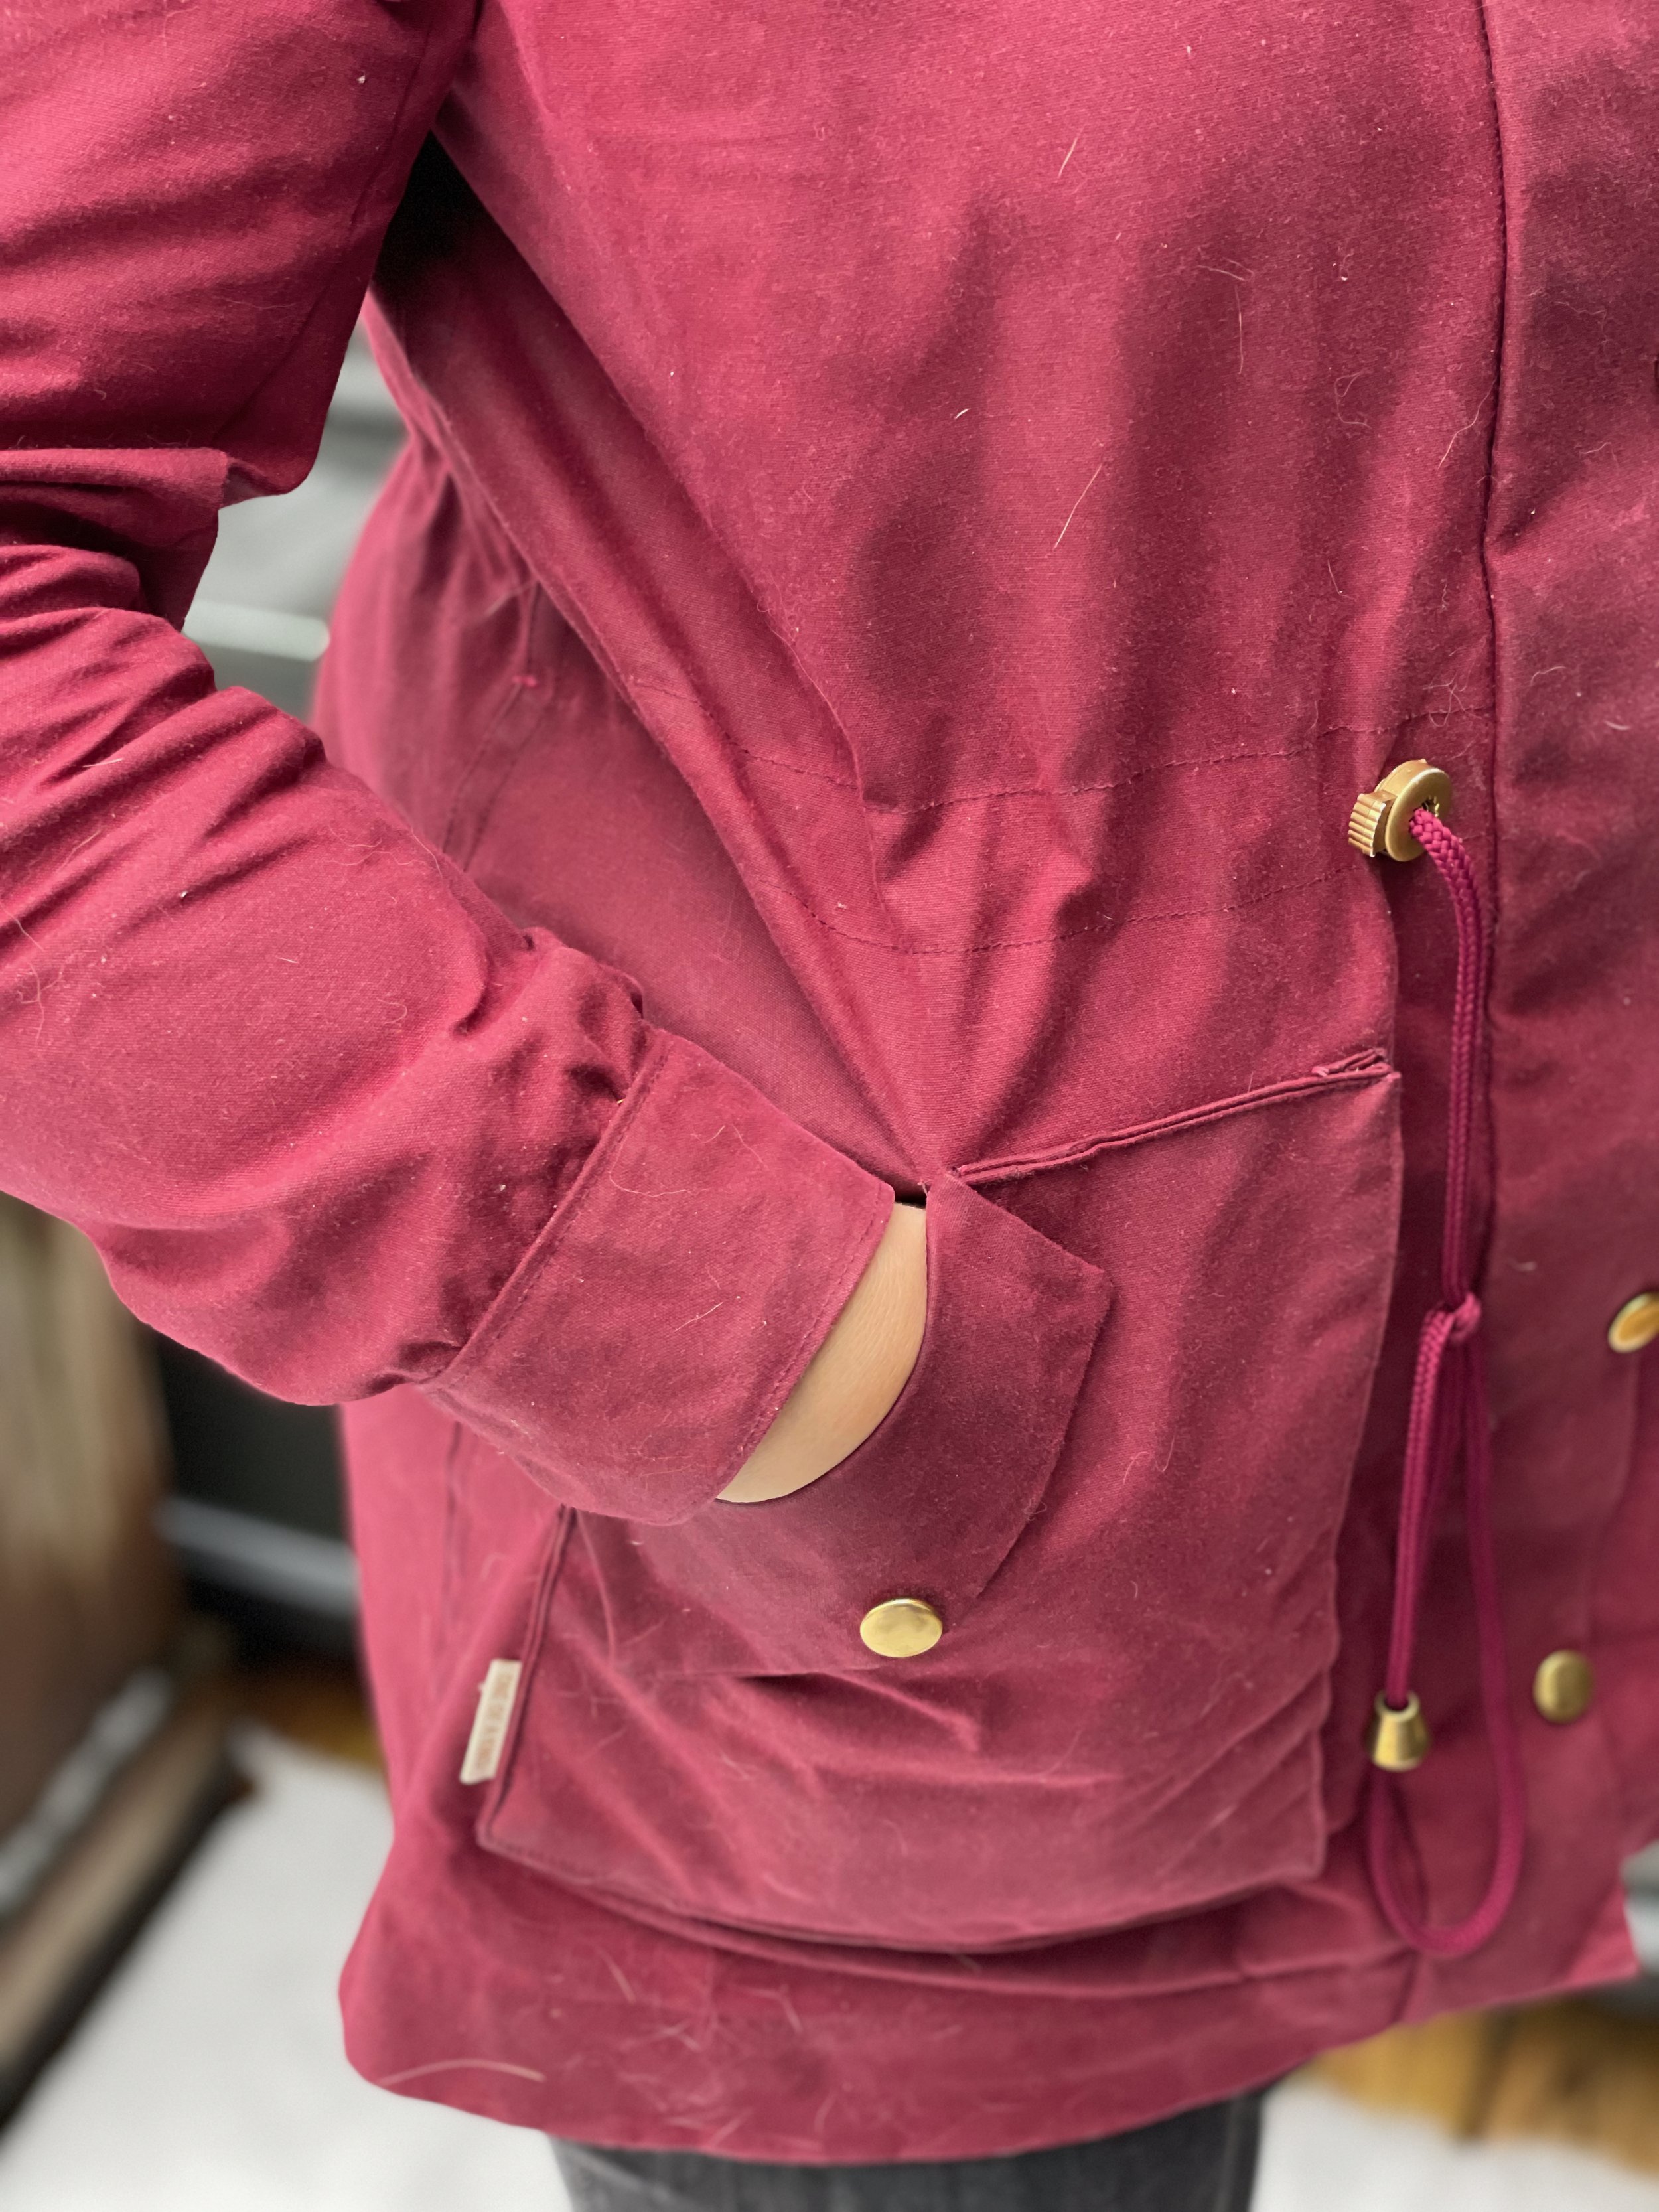
Hello Internet Friends! Welcome to 2022 where I share projects that I never blogged from 2021 😅 This project was a long time in sharing! I originally finished this jacket in late spring 2021, and then promptly hung it in my closet until the fall when the weather got colder….then didn’t get around to taking photos until post move into our new place and am only now getting around to using those photos for a post!
If you’re been following me for a while you’ll know that this isn’t the first Kelly Anorak Jacket from Closet Core Patterns that I’ve made (the post on my original, well loved, fully waterproofed gortex one can be found here, posted a full FOUR years ago almost to the day!) I still love and wear my OG version but was looking to upgrade it a bit. I wanted to make the fit a bit bigger so as to fit more layers, especially when I want to wear some thicker hand knits, as well as modify the pockets a bit to make the ‘faux’ snap pockets functional. I also wanted a more seasonal transitional version that still offered some water resistance but could also be worn on non-rainy chilly days, hence the waxed canvas this time around vs. going full waterproof.
I had never sewn with waxed canvas before so it was fun to try out a new fabric type! This lovely burgundy colourway is from Blackbird Fabrics and I also stocked up on some of their tins of wax as well so that I can re-wax any worn out areas as the jacket ages, all of the hardware is from Dressew. When it arrived the fabric feels quite stiff, and I could see some crease marks from where it was folded but these weren’t a huge deal. Cutting and marking was super easy as you could easily see any impression in fabric so I mostly stuck to my chalk liner and a crease marker to mark everything, keep in mind though that if you make a mistake in your markings you will see those marks since they will leave impressions in the waxed canvas.
It can be a bit tricky to wrangle all of the cut pieces at times due to the stiffness of the fabric when pinning and sewing but you do get used to it! I also used primarily clover clips vs pins to avoid any unnecessary markings on the fabric as much as possible. My machine and hands did get a bit waxy after sewing for a while but everything was easily cleaned with a damp cloth, and I would highly recommend using a new sewing needle and cleaning it every now and then to get rid of any wax build up. The last thing to note about sewing with waxed canvas was that the feed dogs of the machine tended to leave little marks, so keep that in mind while sewing that you’ll want to always sew with right side up for instances, like the hem, where you aren’t sewing right sides together. Since the canvas was quite thick I went for the unlined version of the jacket and sewed ‘faux felled seams’ which also meant paying particular attention when top stitching the seams to again sew with the right side facing.
Sizing and modifications! For this version I cut a straight size 12 and NO modifications! That’s right! no modifications for shortness here! I made a quick muslin and ended up liking the longer length (keeps my bum warm!) and the sleeves were juuuust right! I added the modifications to the hood as outlined in my original post (adding a draw string and knotting the end of the drawstring to the inside of the hood with the toggle on the outside as with many RTW jackets).
Hood details
I used a scrap of some Liberty fabric for the drawstring casing
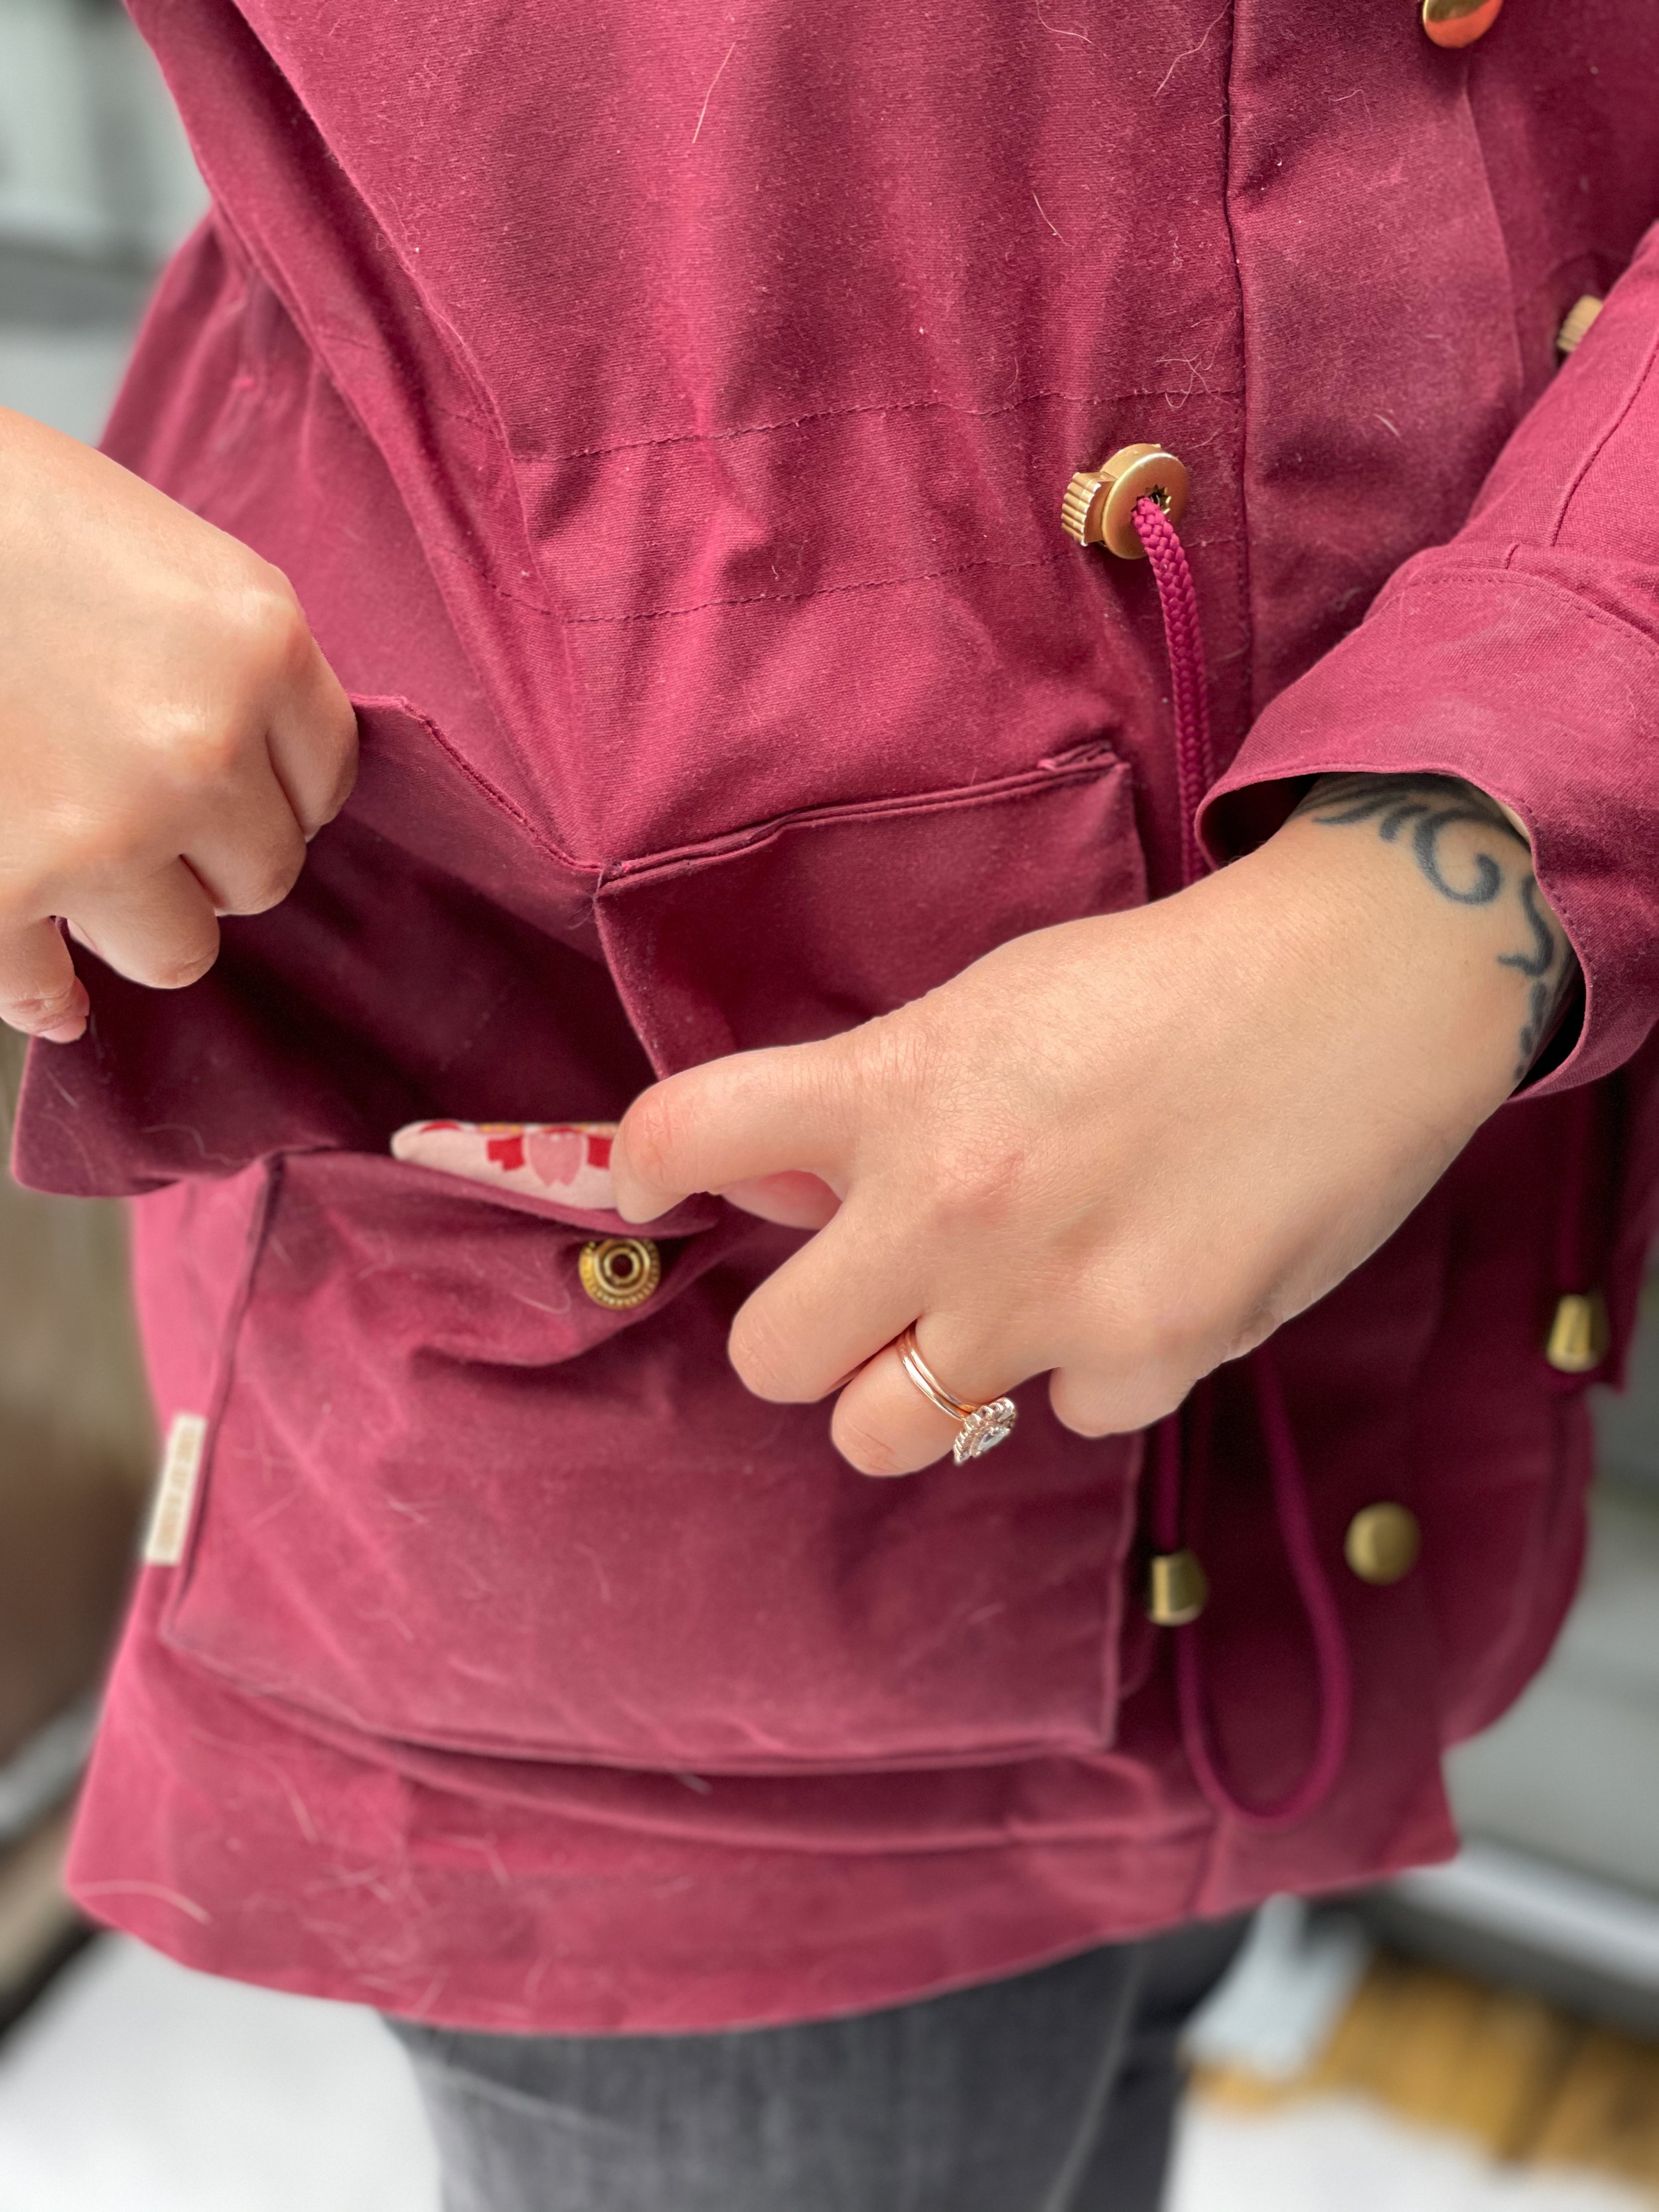
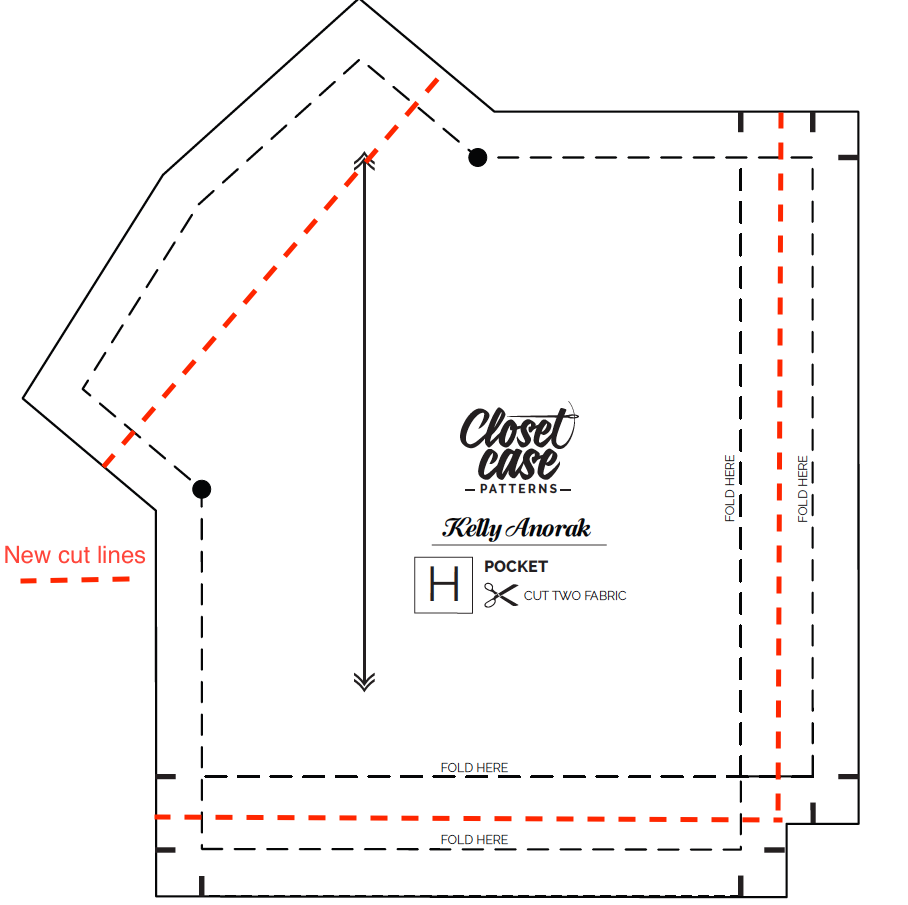
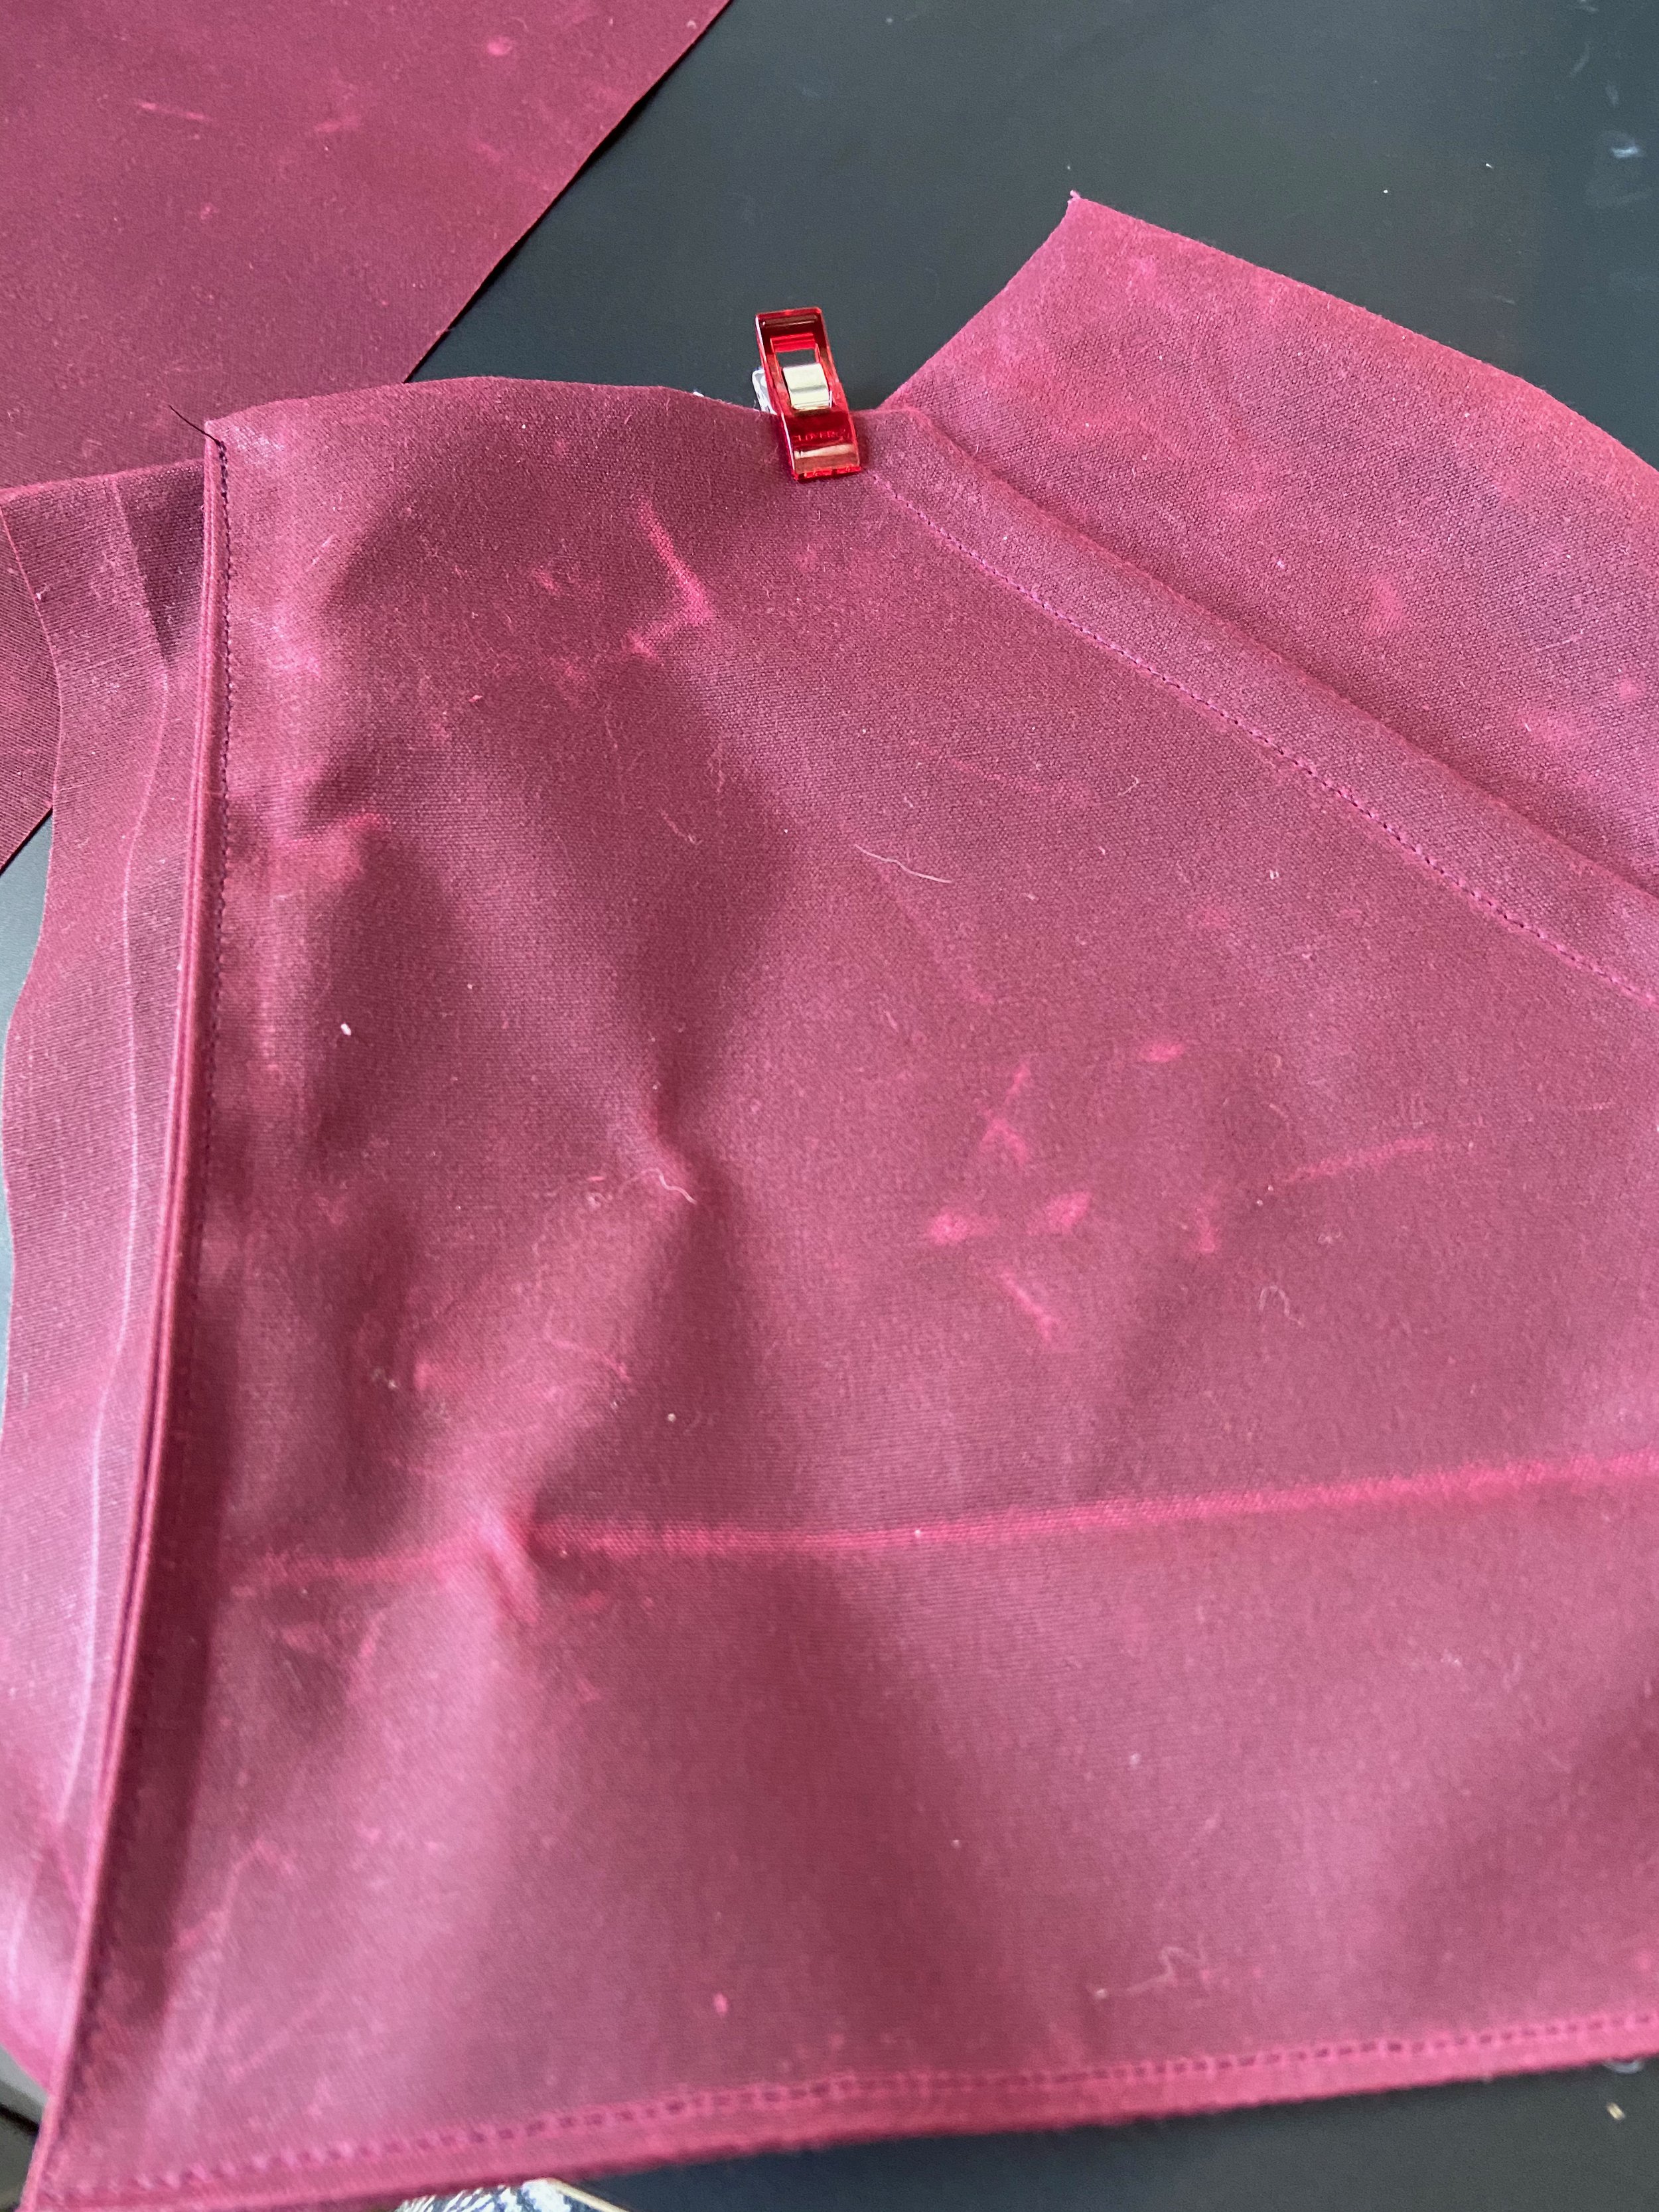
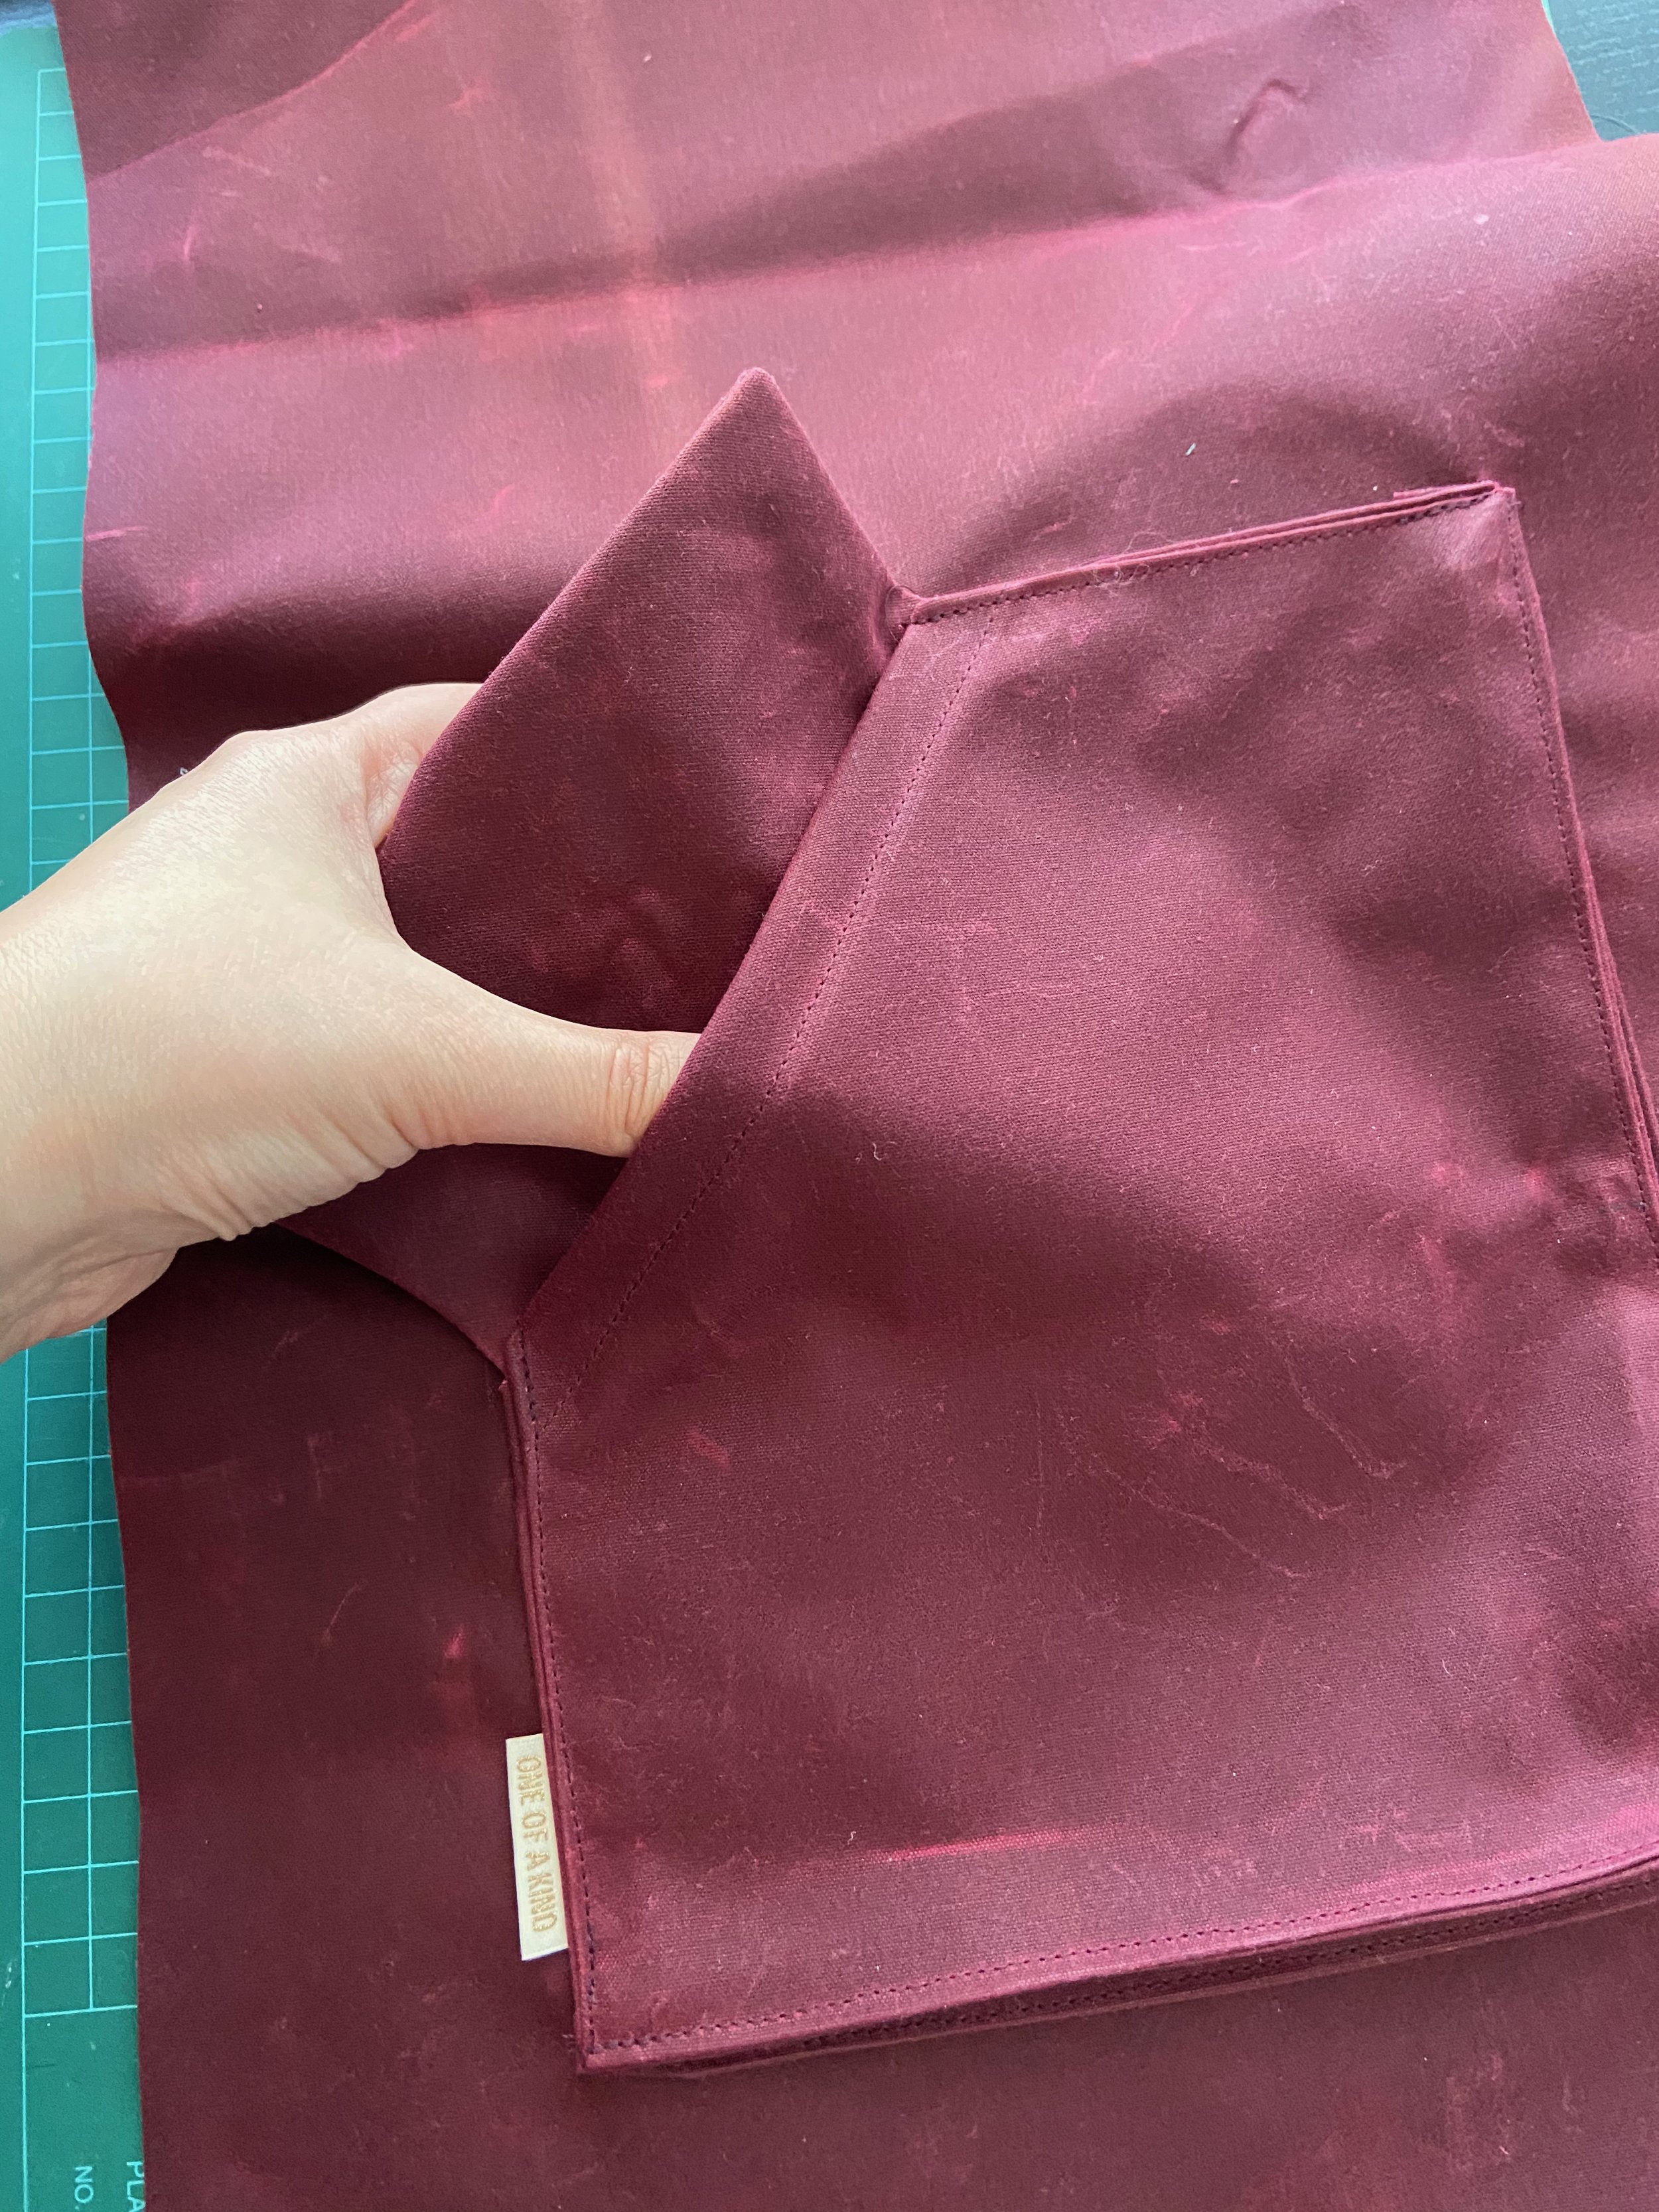
To make the faux pocket flaps into functional ones I did the following: I cut 2 pairs of pocket pieces, one pair I left as is but on the second pair I cut off most of the flap extension, leaving a seam allowance that I could fold over to make a hem for the pocket. I then used the fold lines on the piece to measure out a seam allowance from the inner most fold lines and cut the excess away (see the image below to get a better idea of where I cut). I then folded over the pocket hem and sewed it, followed by folding the remaining fold lines on this modified piece. I then assembled the pocket using the unmodified pair of pocket pieces and the pocket facing as described in the instructions until I got to the step where the outside edge of the pocket is topstitched on the two long sides. Before topstitching I added the modified pocket piece on top, then topstitched the two long sides. I then placed the entire pocket on the jacket front as written in the instructions, with the final two topstitching lines closing the last two open edges of the now ‘non-faux’ pocket! I really love this modification as it adds a secured pocket space to store things like bus passes or a credit card when I don’t want to take my whole wallet. Heather and her team at Closet Core Patterns also provided a modification to the pockets to make the larger pocket space have a closure using the pocket flaps so you have plenty of choice in pocket mods friends!
I really love the fit of this jacket and I’m glad I sized up a bit to allow for more layering options! I’m considering making a new gortex one of this size sometime in the future and potentially retiring my original one (although I do love that jacket a ton so I may have to re-home it as it would be a shame for it to just sit in the closet). The waxed canvas has softened up beautifully as I’ve been wearing it, it was super stiff the first few wears but now it has a lovely ‘lived in’ feel. The canvas is for sure, ‘water resistant’ and not water fully water proof so it does well in a light rain or misting, but you would definitely need an umbrella for a downpour ☔️.
Hope you guys enjoyed this post! I have a feeling I’ll have at least one more jacket post for this year as I’m in the mood to sew some more outwear and refresh that part of my wardrobe (and I have some long stashed wool coating that I would love to use!)! Let me know in the comments if you go through periods of sewing a bunch of outerwear at a time as well!

